
How to Build a Raised Garden Bed from Scratch
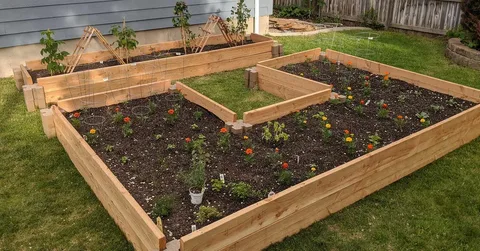
Raised garden beds are an excellent way to grow a variety of plants while keeping your garden organized and accessible. They allow you to control the soil quality, improve drainage, and extend your growing season. Building a raised garden bed from scratch is a simple DIY project that can be completed with minimal tools and materials. Here’s a step-by-step guide on how to build your own raised garden bed.
Materials You’ll Need
- Wooden planks (cedar or redwood are best because they are rot-resistant, but other untreated wood works too)
- Screws (preferably galvanized or stainless steel to resist rust)
- Drill with screwdriver bits
- Saw (hand saw or power saw)
- Measuring tape
- Level
- Landscaping fabric (optional, for weed prevention)
- Soil (a mix of topsoil, compost, and organic matter)
- Shovel
- Gardening gloves (optional, for comfort)
Step 1: Choose the Right Location
Before you start building, select a good spot for your raised garden bed. Here are some important factors to consider:
- Sunlight: Choose a location that gets at least 6 hours of direct sunlight per day.
- Drainage: Ensure that the spot has good drainage. Avoid placing the bed in areas where water collects.
- Accessibility: Make sure the bed is easily accessible for watering, weeding, and harvesting.
Step 2: Measure and Cut the Wood
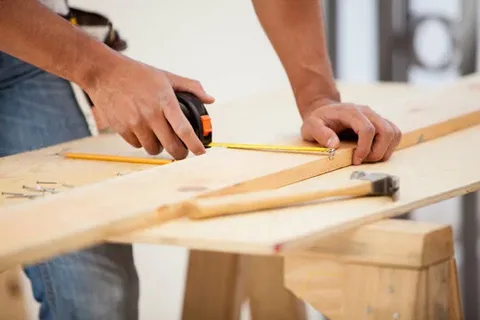
Determine the size of your raised garden bed based on the space you have available and what you want to grow. A typical raised bed is 4 feet wide, as it allows you to reach the center from both sides without stepping on the soil. The length can vary, but most beds are between 4 and 8 feet long. The height of the bed is usually between 12 to 24 inches.
Cutting the Wood:
- Cut the four corners of the bed (two for the length and two for the width).
- Use a saw to cut the wooden planks to the appropriate lengths according to your desired measurements.
Step 3: Assemble the Frame
Once your pieces are cut, it’s time to assemble the frame.
How to Assemble:
- Lay out the four corner pieces of the bed.
- Attach the sides to the corner pieces using screws. Start by securing the shorter sides (width) to the longer sides (length). Use a drill to make pilot holes for the screws to avoid splitting the wood.
- Ensure the frame is square by measuring the diagonals. If the diagonals are equal, the frame is square.
- Tighten the screws securely.
Step 4: Add a Base (Optional)
If you want to prevent weeds from growing up into your garden bed, you can add a layer of landscaping fabric or weed barrier at the bottom of the frame. This step is optional, but it can help keep your garden bed low-maintenance.
How to Add a Base:
- Cut the landscaping fabric to fit the bottom of the bed.
- Lay it out and staple or pin it to the inside of the frame.
- Alternatively, you can leave the bottom open to allow for better drainage.
Step 5: Fill the Raised Bed with Soil
Now that the frame is ready, it’s time to fill your raised garden bed with soil. The key to a healthy garden bed is using a well-balanced soil mix that provides good drainage and nutrients for your plants.
How to Fill the Bed:
- Start with a layer of coarse material at the bottom (such as small rocks or wood chips). This helps with drainage and prevents the soil from compacting.
- Fill the bed with a mix of soil, compost, and organic matter. A good ratio is 60% topsoil, 30% compost, and 10% other organic material like peat moss or well-rotted manure.
- Level the soil using a shovel or rake, leaving a couple of inches of space at the top to prevent overflow when watering.
Step 6: Plant Your Garden
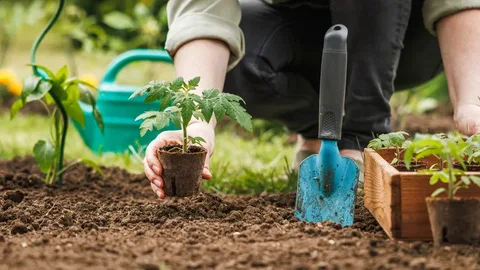
With your raised garden bed now filled with rich, well-draining soil, it’s time to plant your garden. Consider your plant spacing based on the types of plants you want to grow.
What to Plant:
- Vegetables: Lettuce, spinach, tomatoes, cucumbers, carrots, and peppers thrive in raised beds.
- Herbs: Basil, parsley, mint, and thyme grow well in raised beds.
- Flowers: Marigolds, sunflowers, and nasturtiums add beauty and help with pest control.
Step 7: Water and Maintain
Once you’ve planted your garden, it’s important to keep the soil evenly moist, especially during dry periods. Water the bed thoroughly, but be sure not to overwater as this can lead to root rot.
Ongoing Maintenance:
- Mulch: Apply mulch around your plants to help retain moisture and keep weeds at bay.
- Fertilizing: Add organic fertilizers or compost periodically to keep the soil nutrient-rich.
- Weeding: Keep weeds under control, especially if you haven’t used a weed barrier.
Final Thoughts
Building a raised garden bed from scratch is a rewarding and manageable DIY project that can enhance the quality of your gardening experience. Not only do raised beds offer better drainage and soil control, but they also make gardening more accessible and easier to maintain. Whether you’re growing vegetables, herbs, or flowers, this simple structure will provide a sustainable foundation for a thriving garden.